





Setting Up Data Cloud and Marketing Cloud Next in a Salesforce
Highlight text, then choose “Suggest an edit”.Your selection is saved in the bottom bar.
You have got a fresh Salesforce Development Org (SDO) or your fresh production instance, and it might be the case that when searching in the App Launcher for Marketing or Data Cloud, you end up with no results.
It might be a licence issue, or it might be that you need to deploy Marketing Cloud and assign the correct permissions to access Data Cloud.
Go to Setup and search for Marketing Cloud → Basic Settings. Keep in mind that in a fully enabled SDO with all the licences, you may also see Marketing Cloud Engagement Settings, which are used for Marketing Cloud Connect. Make sure you are in the correct settings section.
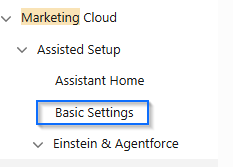
The Basic Settings page gives you a complete checklist of everything you need to set up, so you can simply work through it step by step.
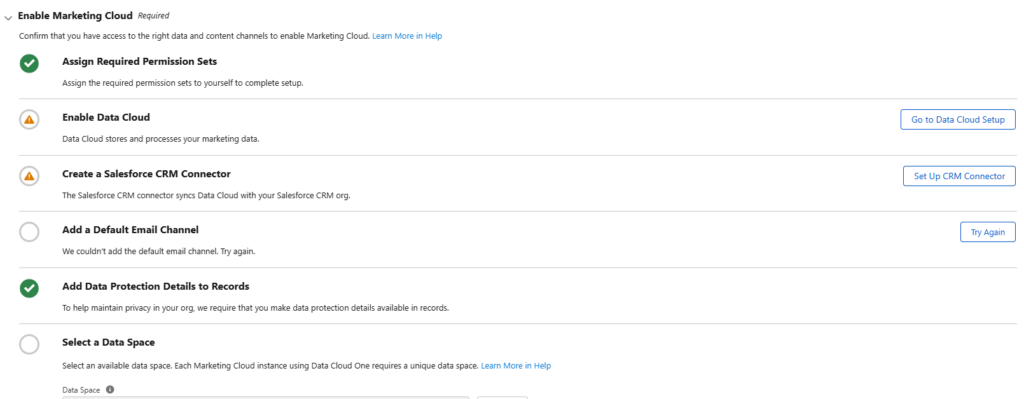
Assign required permission sets
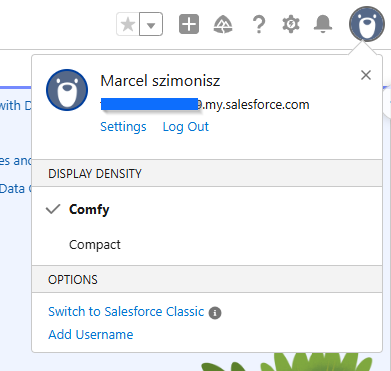
Assign yourself the Data Cloud Architect permission set. To do this, click your profile avatar in the top right corner and open Settings.
Then navigate to Advanced User Details and scroll down to Permission Set Assignments, or simply click Permission Set Assignments at the top of the page.
Enable data cloud
This process is automated. You just need to open the Data Cloud Setup Home page and start the automatic deployment.
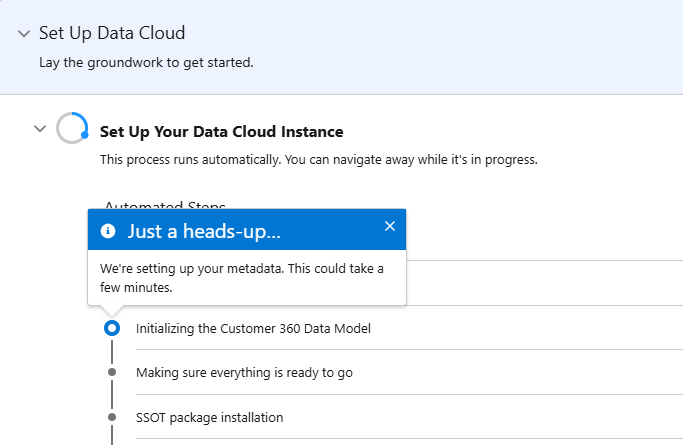
Now it’s time for a well-deserved coffee.

After the coffee break and some we have data cloud deployed and now we can continue on our marketing cloud deployment.
Select a Data Space
Normally, a default Data Space is created automatically.
If you already have a plan for how you want to structure your Data Spaces, head over to Data Cloud and create them under Setup → Data Spaces.
You can create additional Data Spaces if needed, or simply rename the default one to something more meaningful and aligned with your intended data structure.
Select data space and confirm
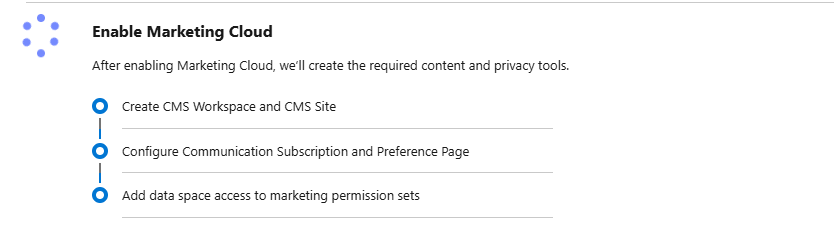
Enable Marketing Cloud
Now, after all these setup steps, we finally get to actually enabling Marketing Cloud.
This is the point where the initial Salesforce and Data Cloud preparation starts coming together, and you can move on to configuring the Marketing Cloud capabilities you actually want to use.
Time for another coffee or short health break as next process is also autodeployed after you confirm you data space
Deploy data streams
Another required step is to deploy the Data Streams.
This will deploy the main Data Streams that Data Cloud needs in order to work properly with Marketing Cloud. These can include, for example, engagement Data Streams, consent-related Data Streams, and data covering different communication channels.
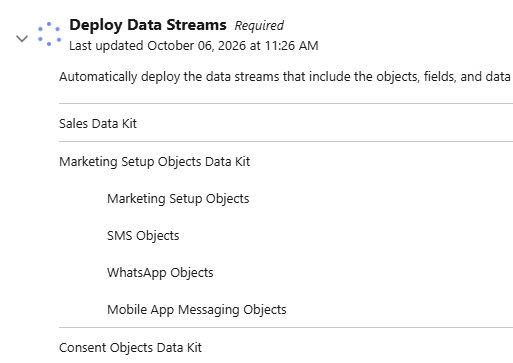
Deploying these Data Streams ensures that the key Marketing Cloud data is available in Data Cloud and can be used for segmentation, activation, consent management, and other marketing use cases.
Now we can step away from the computer again, water our plants, or stretch our limbs, as this process will take another moment or two to complete.
Or, if you’re feeling adventurous, you can continue with the next steps while it runs in the background.
Sometimes, one or more Data Streams may fail to deploy.
If that happens, first try to retry the deployment. In many cases, the issue is temporary and the Data Stream will deploy successfully on the next attempt.
If the deployment continues to fail after several retries, the best next step is to open a case with Salesforce Support and provide the details of the failed Data Stream and any error messages you see.
Configure Identity Resolution Rulesets
Last but not least, you need to bring everything together. The data produced by your CRM, Marketing Cloud, and any other data sources you add along the way needs to be matched and unified into customer profiles.
For that, we need to set up the main Identity Resolution rulesets. These rulesets define how records coming from different sources are matched and reconciled, allowing Data Cloud to create Unified Individual profiles that can then be used across your marketing use cases.
Navigate to Data Cloud → Identity Resolution → New.
Create a new Identity Resolution ruleset, select the appropriate Data Space, and choose Individual as the Primary Data Model Object.
You can also add a meaningful Ruleset ID, for example MKT or MAIN, to make it easier to identify later. Do mind this will create DMOs (Data Model Objects – tables – with the Ruleset ID as suffix)
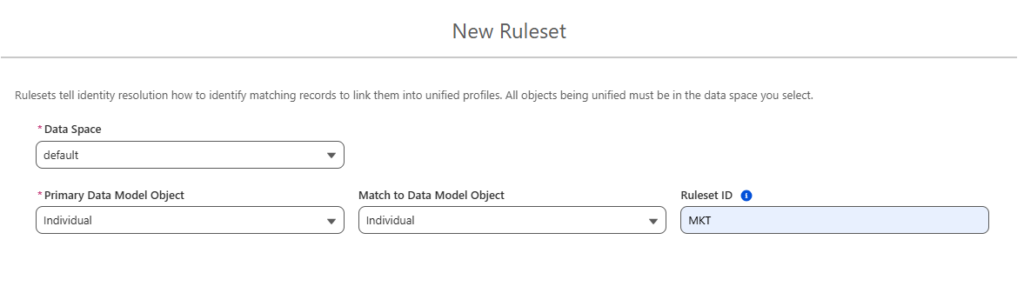
After giving the ruleset a name, we need to create the Match Rules.
To begin with, you can use fuzzy name matching together with a normalized email match. The exact rules you choose will depend on the channels and data sources you plan to use later.
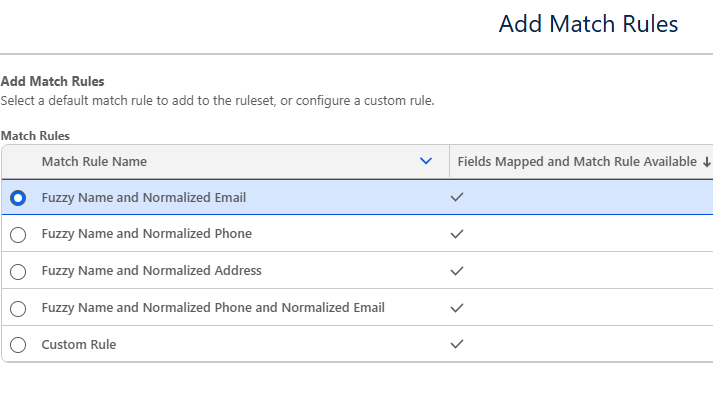
If your requirements become more complex, you can also create your own custom match rules to better reflect your data and identity strategy.
esolve any remaining warnings, and you’re good to go.
I usually get these two warnings after the first deployment, so don’t be surprised if you see them as well:
- Reconciliation rule warning (1):Select a supported reconciliation rule for ID fields. Review these fields.
- Data mapping warnings (1):Map all required fields to create your unified profiles. Review these data lake objects.
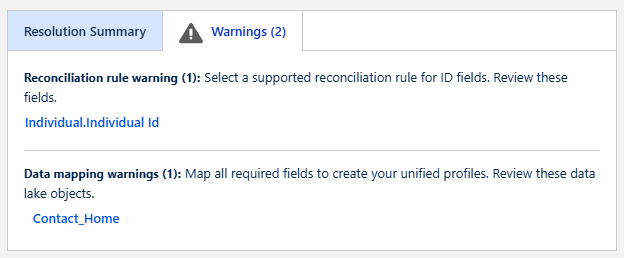
The first one basically means that you need to create a Reconciliation Rule, as the same field can come from multiple data sources.
Scroll down, find the field showing the warning, and click on it. Then enable the Reconciliation Rule and select the appropriate option from the drop-down menu. I usually select source priority for this particular issue.
This determines which value should be used when the same field is populated by more than one source.
The second issue you may run into is a missing required field mapping.
Click the link shown in the warning, which will take you directly to the data mapping for that object. On the right-hand side, look for the field marked with a warning.
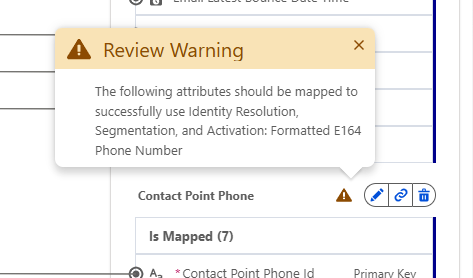
In my case, the missing field was Formatted E164 Phone Number on Contact Point Phone. Since I plan to use SMS and WhatsApp, I want the customer’s actual mobile number to be used, so I mapped the Contact’s Mobile Phone field to the required phone fields, including Telephone Number and Formatted E164 Phone Number.
This also fixes the warning and ensures that the mobile number is available in the format required for mobile messaging.
However, the correct mapping depends on your implementation. Your organisation might store the messaging number in Mobile Phone, Phone, a custom field, or even another source system. The important part is to identify which field contains the number that should actually be used for SMS or WhatsApp and map that field correctly into Contact Point Phone.
So, in my case, the solution was simply to replace the default phone mapping with Mobile Phone and complete the missing Formatted E164 Phone Number mapping.