





How to Download, Install and Connect the Adobe Campaign Classic v7 Console
The Adobe Campaign Classic v7 client console is a Windows application that connects to a Campaign application server. Download the client console setup package from the Campaign server for the environment you need to access, install it on the Windows computer, then configure the server connection and sign in. Adobe documents the setup package and installation process in its client console installation instructions.
Download the Client Console
Open the Campaign server connection page supplied for the intended environment and download the client console setup package. Use the connection details provided for that environment when configuring the console after installation.
NOTE:You can download the Adobe Campaign Client Console through Adobe Software Distribution if your organization has a Campaign license and you have access. Otherwise, ask your Campaign administrator for the dedicated installation URL.

Install the Client Console on Windows
Run the downloaded setup package on the Windows computer where the console will be used. Complete the installation prompts, then open the Adobe Campaign Classic client console.
Installing the client console completes the local application setup. It does not sign the user in to a Campaign environment.
Connect to the Campaign Application Server
In the client console, create or select the connection for the required Campaign application server. Enter the server address and sign in with the credentials assigned for that environment.
Keep separate connection entries for separate Campaign environments, such as development, test, and production, so that the selected server is clear before sign-in.
Confirm the Connection
Confirm the local installation by opening the client console. Confirm access to the Campaign environment only after the console connects to the selected application server and the user signs in successfully.
If sign-in does not complete, recheck the server address and the credentials supplied for the selected environment before changing the local installation.
How to set up Connection strings in XML
You can also ask a colleague for their connection strings, then save them in your console. To open the connection strings XML, go to File > Connection Strings, right-click in the area where the connection strings are listed, and select Edit XML.
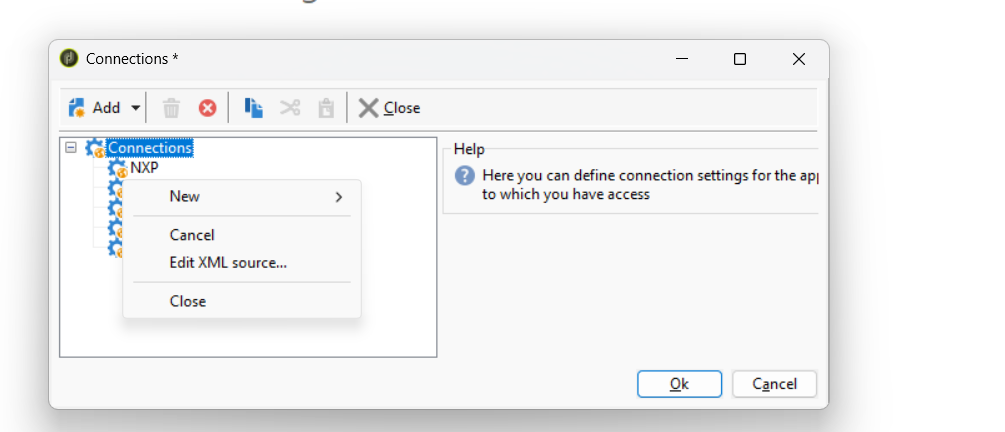
Copy and paste provided connection strings
<connections xtkschema="xtk:connections">
  <cnx id="1" label="xx" url="https://xx.campaign.adobe.com"/>
</connections>Share With Others
 Platinum