




How to Preview, Test and Send Your First Email in Salesforce Marketing Cloud Engagement
An email in Marketing Cloud Engagement is built in Content Builder, checked against subscriber data, tested, and then configured for delivery through Email Studio Send Flow. The email creation process ends with preview, testing and saving. The production send is configured separately.
Create the Email in Content Builder
If the email asset is not ready, start by building the email in Content Builder. In Content Builder, select Create, then Email Message. In Define Properties, select the required creation method, such as an existing template or a pre-configured Marketing Cloud template, then complete the required properties and select Next.
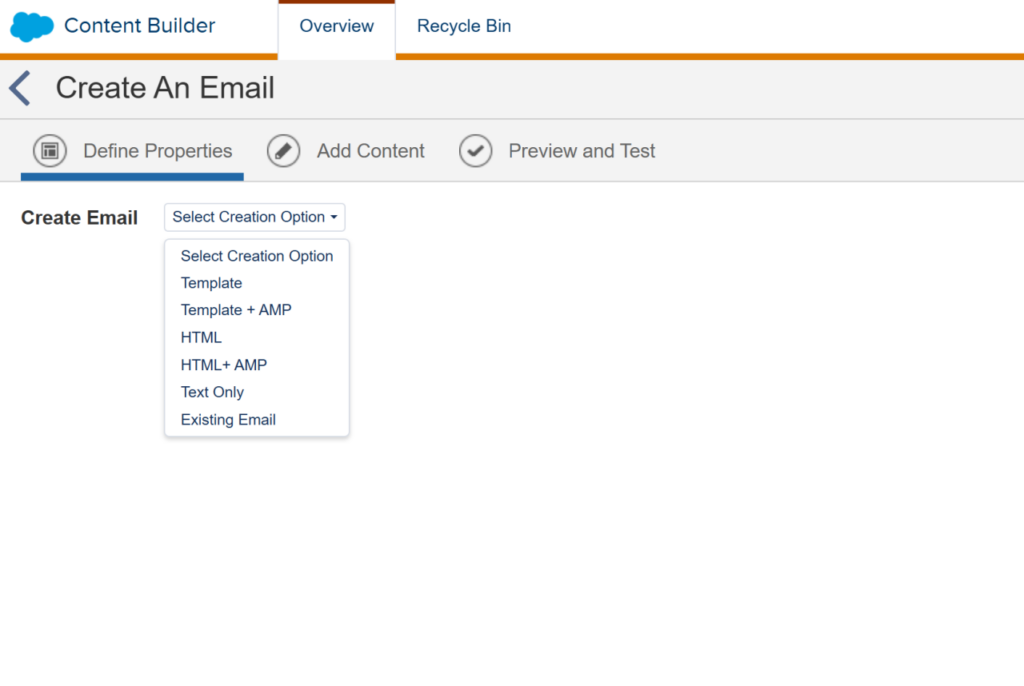
Build the email in Add Content using the available content blocks or selected creation method. Once the email content is ready, continue to Preview and Test to check the email against subscriber data and send a test.
The email can then be saved and used in the appropriate sending process, including Email Studio, Journey Builder, or Automation Studio, depending on how the campaign is configured. For an Email Studio send, the email can be configured with a Data Extension as the target audience.
Preview the Email with Subscriber Data
Subscriber Preview renders the email against a selected subscriber record. This allows personalisation to be checked using actual values from the selected record. The preview and test process includes selecting a Data Extension and subscriber record before testing the email.
In the Subscriber Preview and Attributes section, select the folder icon, choose Data Extensions, select the required Data Extension, choose a subscriber, and select Select.
The attributes panel displays the subscriber’s data, while the email preview renders the corresponding values in the content. For example, a first-name personalisation value is replaced with the first name stored for the selected subscriber.
The Mobile option reduces the preview width, making it possible to check the email at a mobile size.
This is worth checking before sending a test because it allows you to catch personalisation or content issues against an actual record.
Send a Test Email
After the subscriber preview has been checked, select the Test Send icon and enter the email addresses that should receive the test email.
Select Send Test, review the Test Send Summary, and select Confirm and Send. A success message confirms that the test has been sent.
The Subject Line Qualifier can also be changed before the test is sent. The default value is [Test]:, which identifies the message as a test in the subject line.
A test send uses the selected subscriber data for the email build while delivering the message to the specified test email address.
Review the Test Email
Once the test email arrives, check the preheader, subject line qualifier, subject line, and the different sections of the email to confirm that the content is rendering as expected.
The web version can also be opened to review the rendered email and test the links. Before the production send, check that the links work as expected and verify that the required tracking parameters are appended correctly.
If an issue is found, update the email and send another test before proceeding to the production send.
Configure the Send
Once the email has passed testing, then approve it if there is any approval process in place, and open it from Email Studio and select Send to configure a User-Initiated Send. The Data Extension Send Flow is then used to configure the audience, sender, delivery and tracking settings.
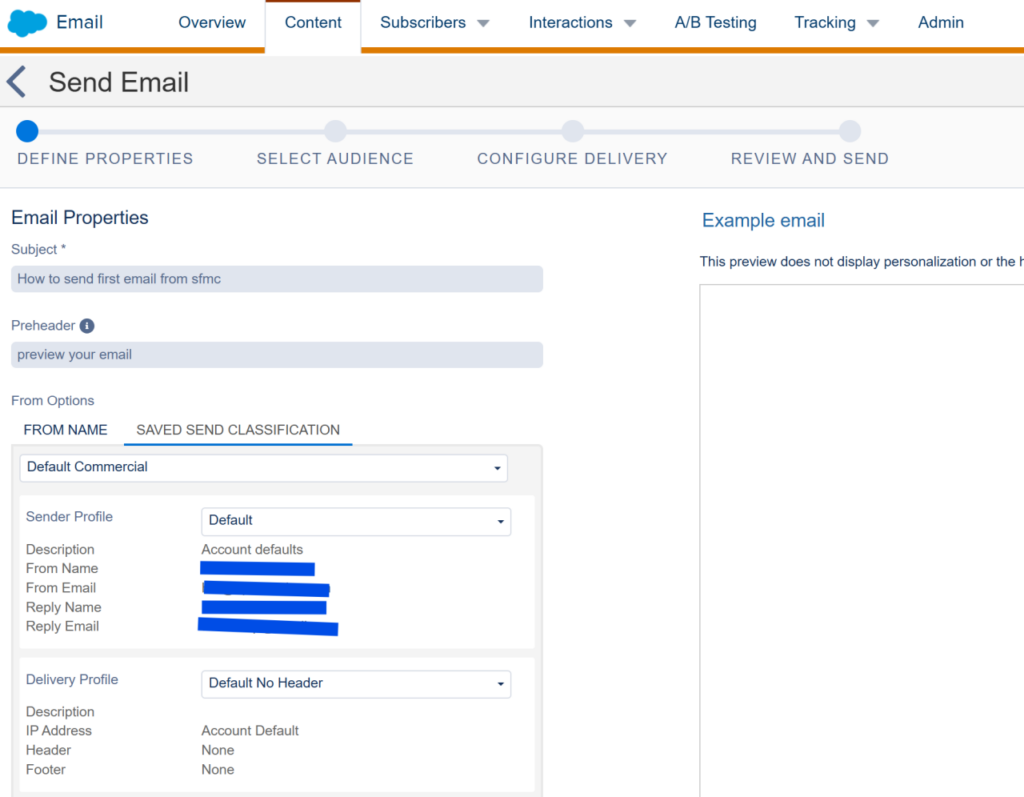
Subject, Preheader and From Name
Enter the Subject Line and add the Preheader text if required.
Sender information can be configured using the available From Name and From Email address settings or a Saved Send Classification, depending on the account configuration.
These settings should be reviewed separately from the email content because they determine how the message is presented in the recipient’s inbox and which sender configuration is used for the send.
Select the Audience
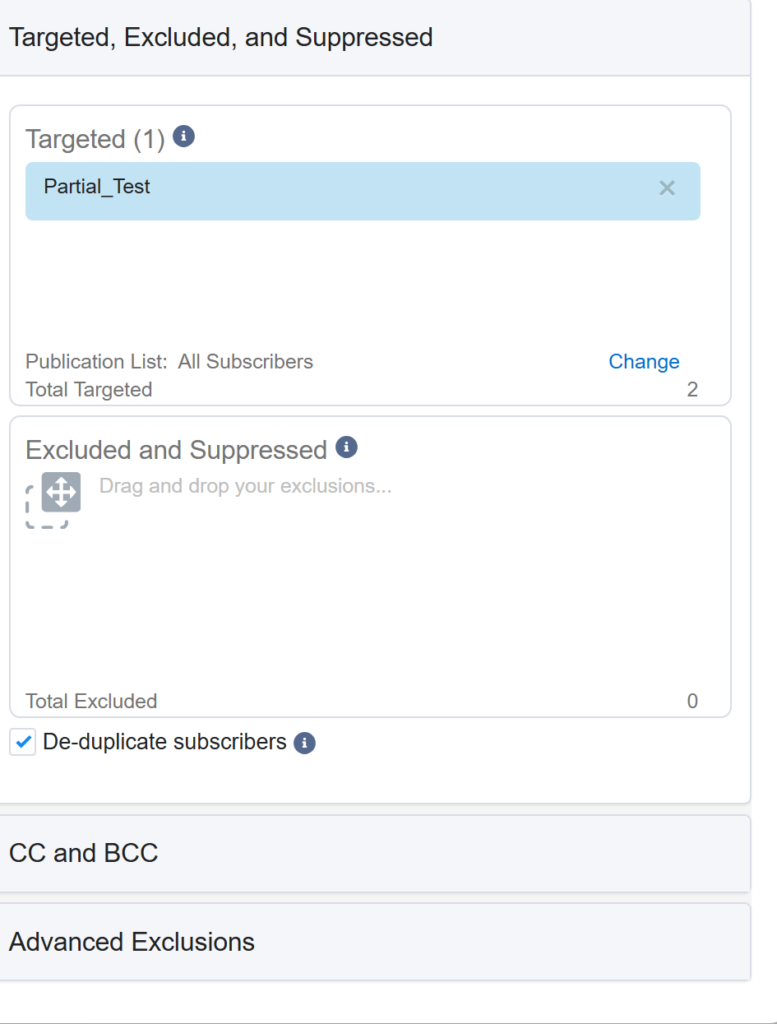
Select the audience that should receive the email. For a Data Extension send, select Data Extensions, choose the required Data Extension, and select the associated publication list when prompted.
The sending Data Extension also needs to be configured correctly. A sendable Data Extension requires an appropriate email address field and subscriber relationship for the send.
Review Duplicates and Exclusions
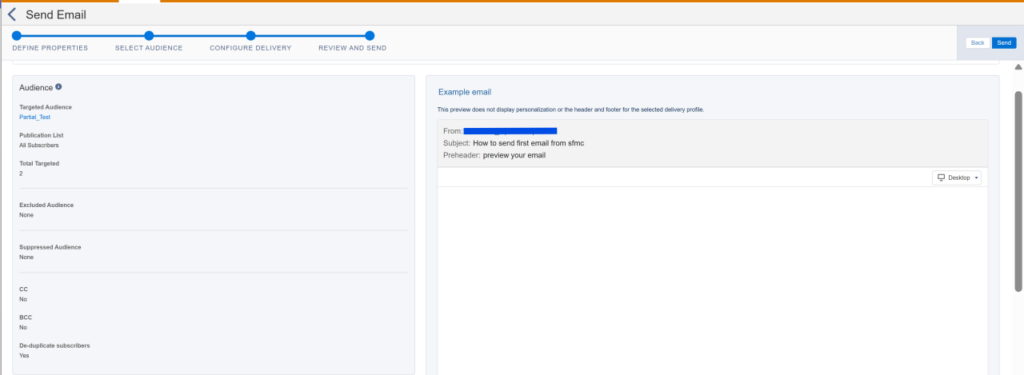
When the same subscriber can appear more than once in the audience, review the de-duplication settings before sending. Otherwise, the same subscriber can be present in the send audience more than once.
Exclusion and suppression settings should also be reviewed. A subscriber can exist in the target Data Extension but still be excluded from the final send audience.
This check is particularly useful when the expected audience count does not match the number of subscribers included in the final send.
Configure Delivery and Tracking
Under Send Timing, choose whether the email should be sent immediately or scheduled for a later time.
Review the available tracking and advanced options required for the send. For example, Track Clicks can be enabled when click tracking is required, while Retain Send Log Data can be used when email variable values need to be retained for the send.
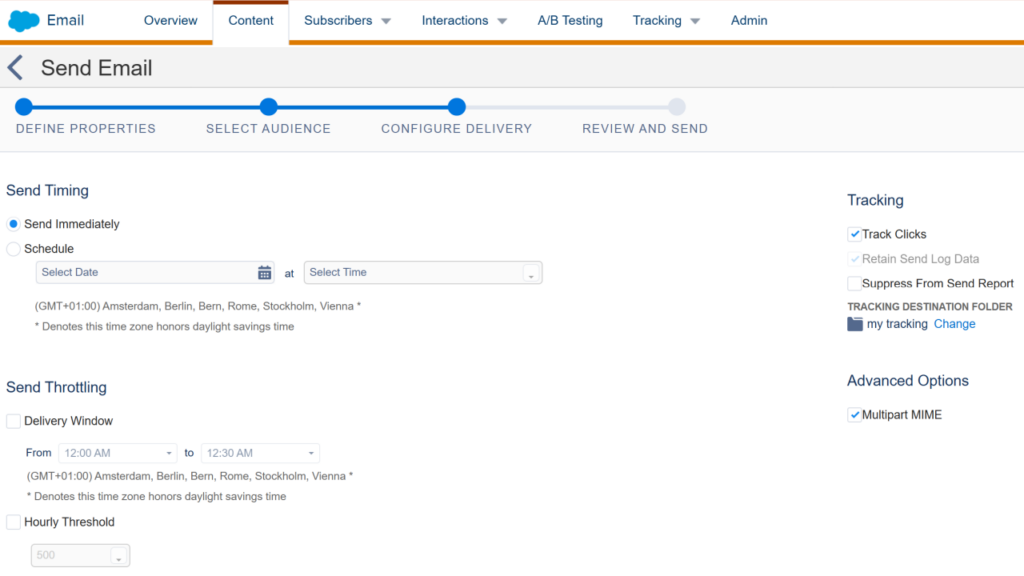
Only the options required for the particular send need to be enabled. Additional Send Flow settings can be reviewed when they are relevant to the campaign requirements.
Review and Send
Before sending, review the complete send configuration:
- Email content
- Subject line and preheader
- From Name and sender configuration
- Target Data Extension
- Publication list
- Exclusions or suppression settings
- Send timing
- Tracking options
When the details are correct, select This information is correct and this email is ready to send, then select Send.
Test Email Not Received
If a test email doesn’t arrive, check the send in Email Studio > Tracking first. The test-send troubleshooting covers the main checks around subscriber status, Data Extension email fields, List Detective and AMPscript errors.
If the send completed but the email wasn’t delivered, check the following:
Subscriber Status
The subscriber used for the preview must have an Active status.
When previewing against a Data Extension, the subscriber status in All Subscribers should also be checked.
Data Extension EmailAddress Field
A sendable Data Extension should have exactly one field using the EmailAddress data type. Having more than one or no EmailAddress field can cause problems when Marketing Cloud Engagement needs to create or process a subscriber record.
List Detective
List Detective checks email addresses at send time. An address identified by List Detective can therefore be excluded from the send even though it exists in the Data Extension.
AMPscript and RaiseError
AMPscript can also prevent a subscriber from receiving the test. In particular, a RaiseError() condition that evaluates to true for the selected subscriber can cause the test send or preview to fail.
When the reason for a skipped subscriber is not immediately clear, tracking information and a Not Sent Tracking Extract can provide additional information about why the subscriber was not sent the email.