





How to Configure the Cells Activity in Adobe Campaign Classic
The Cells activity in Adobe Campaign Classic is used to define cells for target-population processing in a workflow. Configure the activity against an established input population, define the required cell rules, and validate the resulting workflow paths against the documented Cells activity configuration.
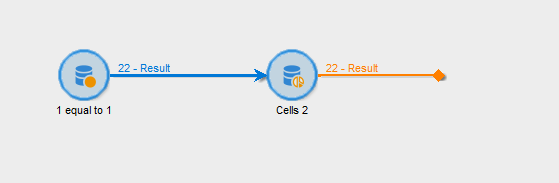
My humble take is that no one ever really used it. I am not saying it is not useful, but I have never seen anyone brave enough to really play with it.
You can achieve similar results with a Split activity, but the main difference is that Split creates separate transitions for each subset, whereas Cells keeps everything in a single transition. You can choose to exclude or keep particular cells, or filter the incoming population and suppress the rest.
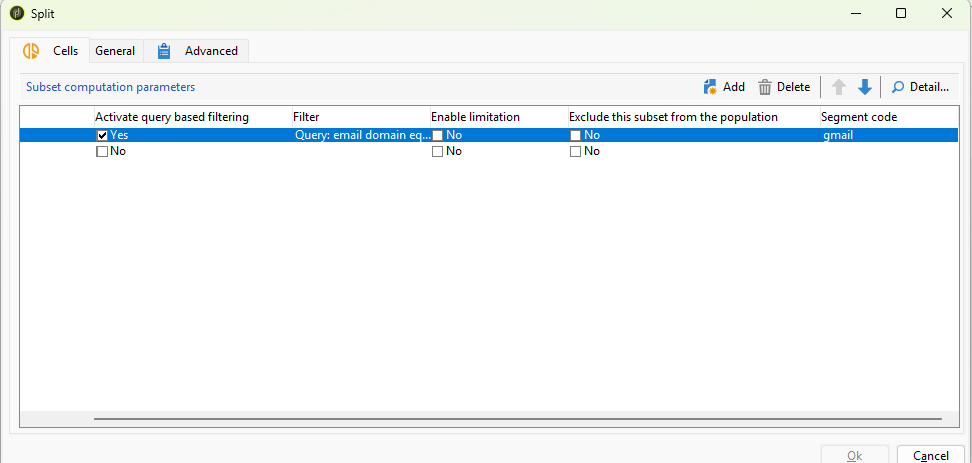
If you want to identify which subset each record belongs to later in the workflow, you need to add a segment code.
How the Cells Activity Fits into a Workflow
Place the Cells activity after the workflow activity that establishes the population to be processed.
The Cells activity, however, simply marks each cell with a name, which is optional. If you want to exclude a particular cell from the main population, select the Exclude from population option.
Do not use cell labels as a substitute for selection logic. A label documents the intended purpose of a cell; its configured rule determines which records meet that purpose.
Configure the Cells Activity
- Open the workflow containing the population to be processed.
- Add the Cells activity at the point where the population needs to be divided into planned treatments.
- Open the activity configuration.
- Add the required cells and give each one a clear, purpose-based label.
- Define the rule for each cell using the fields and targeting data available to the workflow.
- Review the transitions and downstream paths created by the configured activity.
- Save the workflow and validate it with a controlled population before production use.
Use labels that make the workflow readable during review, such as:
- `Premium_Offer`
- `Standard_Offer`
- `Control`
- `Excluded`
Define Cell Rules Before Building Downstream Paths
Write the treatment rules before connecting downstream workflow activities. This avoids creating branches whose business purpose and population logic are unclear.
For each planned cell, document:
| Cell | Intended records | Intended treatment |
|---|---|---|
| Premium offer | Records meeting the premium-treatment rule | Premium campaign path |
| Standard offer | Records meeting the standard-treatment rule | Standard campaign path |
| Control | Records reserved from the campaign treatment | No campaign treatment |
This is an illustrative campaign-routing model, not a documented Adobe example. The actual cell rules must match the available fields, the selected targeting data, and the treatment design for the workflow.
Confirm Population Allocation Behavior
Do not assume that cell definitions are mutually exclusive, exhaustive, or evaluated in a particular order. Confirm the allocation behavior available in the Cells activity configuration and test it with records whose expected treatment is known.
For a mutually exclusive campaign design, define the intended distribution before testing:
Input population
= premium treatment
+ standard treatment
+ control treatment
+ intentionally excluded records
Use this as a planning check rather than as an assumption about activity behavior. The test should show whether the configured rules place records in the intended treatment paths.
Illustrative Delivery-Routing Pattern
A campaign workflow can separate audience qualification from treatment assignment. For example, an upstream selection step can identify campaign-eligible records, while cell definitions represent the premium, standard, control, and exclusion treatments.
Population selection
 |
Cells
 |---- Premium treatment ----> Premium campaign path
 |---- Standard treatment ---> Standard campaign path
 |---- Control treatment ----> Control path
 |---- Exclusion treatment --> Exclusion path
This diagram is an illustrative workflow design. Review the configured transitions in the workflow rather than assuming that every planned cell produces the same transition structure.
Validate Before Production Execution
Validate the activity with a test population that contains records expected to match each treatment rule. Record the expected count and intended outcome for every test record before running the workflow.
Check the following points:
- The upstream selection produces the intended test records.
- Each cell label identifies a distinct business treatment.
- Each rule uses fields available to the workflow population.
- The configured transition structure matches the downstream workflow design.
- Records expected to be included, excluded, or assigned to a control treatment are handled as planned.
- The observed results match the documented cell-allocation behavior.
If counts differ from the intended distribution, inspect the input population and the configured criteria for each cell before using the workflow for a production delivery.
Common Configuration Review Points
A planned treatment has no records
First confirm that the test population contains records expected to meet that treatment rule. Then review the fields and values used in the cell definition, including blank values and values that differ from the selection criteria.
Records appear in an unexpected treatment
Compare the record’s input values with every relevant cell rule. This identifies whether the issue is in the upstream selection, the treatment rule, or an incorrect expectation about how cells are allocated.
The workflow design does not match the cell plan
Review the configured transitions after saving the activity. Each planned treatment should have an intentional downstream path, and unused or ambiguous paths should be removed before production execution.
Test results are difficult to interpret
Use a small controlled population with known record attributes and expected outcomes. Testing a limited set of records makes it easier to isolate rule logic from broader audience-selection issues.
Share With Others
 Platinum