




How to Build a Signup Form in Marketing Cloud Next

Building a signup form in Marketing Cloud Next usually comes down to 3 connected pieces: the form experience, the data destination, and the post-submit automation. The form itself is the easy part – the real implementation work is deciding what record should be created or updated, how consent is stored, and what should happen immediately after someone clicks Submit.
Marketing Cloud Next Signup Forms Work Differently from Classic SFMC Forms
Marketing Cloud Next runs much closer to Salesforce Core than classic Marketing Cloud Engagement. That matters because a signup form is not just writing rows into a data extension. It typically interacts with CRM data, permissions, validation logic, campaign attribution, consent fields, and automation built around Salesforce records.
The biggest difference is ownership of the post-submit process. In classic SFMC, teams often think in terms of CloudPages, Smart Capture, AMPscript, and data extensions. In Marketing Cloud Next, the cleaner pattern is usually CRM-first: capture the form submission, create or update the appropriate Salesforce record, and then use that record for segmentation, journeys, sales follow-up, or reporting. For this salesforce uses feature called form handler.
What is a Form handler?
One of the more welcome improvements in Marketing Cloud Next is the Form Handler. It removes a lot of the plumbing that teams previously had to build and maintain themselves around form submissions.
You no longer need to create the actual landing page with the form HTML, handle the submission yourself, check whether the form was submitted from a whitelisted domain, or determine whether the submission is spam. Salesforce Form Handlers take care of that layer for you. They seem to have been inspired by Pardot Form Handlers and work in a very similar way: you define which fields you want to capture, map them to the appropriate Salesforce fields, and then connect the Form Handler to a Flow that processes the submission.
What I like about this approach is the separation of concerns. The front end can live almost anywhere, while Salesforce handles validation, mapping, security checks, and the post-submit business logic.
Set up a Form handler in Salesforce Marketing cloud next
Now that we know what a Form Handler is, I hope you are as excited as I am about this leap into the 21st century. You can create a Form Handler from a campaign, or, if the form submission does not need to be assigne to a campaign, you can go directly to Content and create one from there.
Mapping Form Fields to Object
When mapping fields in a Form Handler, you also need to decide which object the submission should create or update. In Marketing Cloud Next, this adds another layer to consider because you can work with Prospects, Leads, or Contacts. A Prospect can be used for someone who has not yet entered the standard Salesforce sales process, a Lead represents a potential customer being qualified by Sales, and a Contact represents a known person associated with an Account. Depending on your use case and data model, you can configure the Form Handler to work with any of these objects and then map each form field to the appropriate field on the selected object.

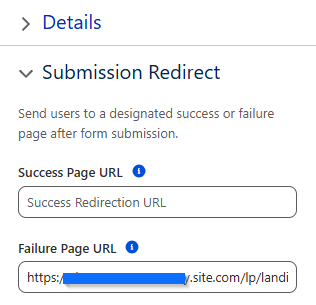
Next to the fields, you can see additional settings that let you select the object, define details like title and description, configure the redirect after submission url, and manage the flow settings.
NOTE: Personally, I do not recommend using a Success Page URL redirect. In my experience, it opens the success page in a new tab while leaving the original form page open with all submitted data still populated. A better approach is to configure only a Failure Page URL and let the client handle successful form submissions on their side, for example by displaying a confirmation message, clearing the form, or redirecting the user as needed.

Double opt in form handler processing flow
The Flow is triggered by the Form Submission event. From there, it first creates a Lead using the data captured by the Form Handler. After the Lead is created, a double opt-in email is sent to the submitted email address.
The Flow then waits for a specific event, in this case the recipient confirming their email address. If the confirmation happens within the defined time window, the Flow continues to the Email confirmed step and updates the consent accordingly. If no confirmation is received before the timeout, the Flow simply ends.
This is where Form Handlers become much more useful than just a way of collecting form data. The submission can immediately trigger CRM record creation, consent management, emails, qualification logic, notifications, or basically any other process that you can build in Flow.

If you make any changes to the Form Handler – not only adding new fields, but modifying any settings – you must create and activate a new version of the Flow, even if no changes were made to the mapping fields. Otherwise, the Form Handler will stop working.
Client side form handler implementation
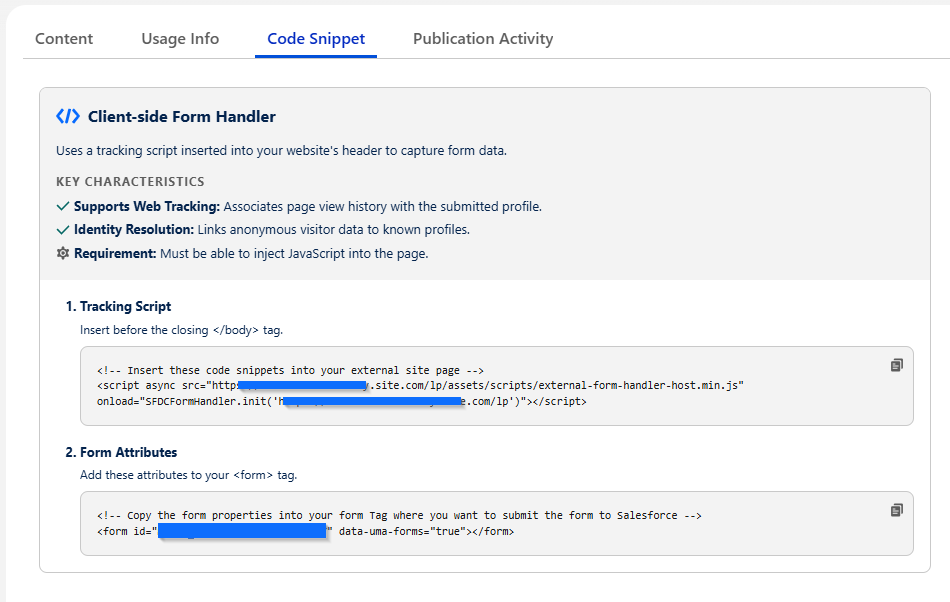
Once you define the fields, setup Submission redirect or error handling and create the desired logic in your Form Handler Flow, and the Form Handler is published, you can implement the actual HTML form with all the inputs and validation on any page, hosted on any tech stack. In the tab Code snippet you will find instruction on how to do it. Basically insert form handler library and implement the form html with id shown on this tab.
Securing form handler from spam submission
Good old bots. Once they discover your form, things can get messy very quickly. We had a case where a bot hammered a form thousands of times, using a different email address for every submission. These appeared to be real, working addresses, most likely leaked from somewhere. As a bonus, the bot placed a link to some Russian wheel-of-fortune website in the first-name field, which we then cheerfully personalized into emails sent to all those unfortunate recipients. The whole incident came surprisingly close to disrupting our email operation.
With form handlers in salesforce marketing cloud next we have couple of out of the box option we can use.
CORS
Configure CORS settings to restrict which domains are allowed to submit data to your Form Handler. This helps prevent unauthorized websites from sending requests to your endpoint and ensures that only approved domains can use the form.
These settings provide an additional layer of protection and can significantly reduce unwanted bot submissions.
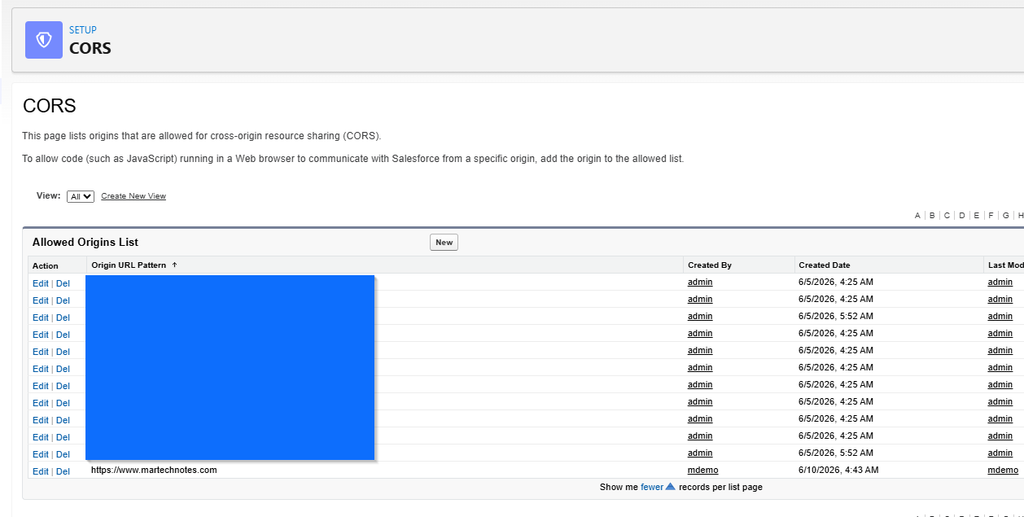
If CORS correctly setup this should remove any direct HTTP post requests to the form handler

Honeypot Field
A honeypot field is a hidden form field that legitimate users cannot see or complete. Many automated bots fill in all fields on a page, including hidden ones. If the honeypot field contains a value when the form is submitted, the submission can be rejected automatically.