


Avoid Editing Conflicts: How to Lock Workflow
Many times, I have encountered situations where multiple individuals were simultaneously editing the same workflow. In such cases, the version that is saved last ultimately takes precedence. To avoid this issue, a simple solution would be to implement a workflow lock, which can prevent such scenarios from arising.
We want to achieve following business logic:
- User can lock/unlock workflow to prevent other operators editing the workflow at the same time
- Locked workflow can be modified only by who ever owns the lock (even admin gets error)
- Admin can unlock workflow even without owning the lock
This can be achieved by following steps:
- add new field to
xtk:workflowschema eg. lockedBy where you would store operator id. Each time someone presses the lock button it will either lock the workflow or unlock it. add lock/unlock buttontoxtk:workflowform- add new schema methods to
xtk:workflowschema and in JavaScript library - add sysFilter to
xtk:workflowschema or add validation to thextk:workflowinput form
Extending schema
Find schemas under Administritaion -> Configuration -> Data schemas and click on Add new schema. We will extend out of the box xtk:workflow schema.
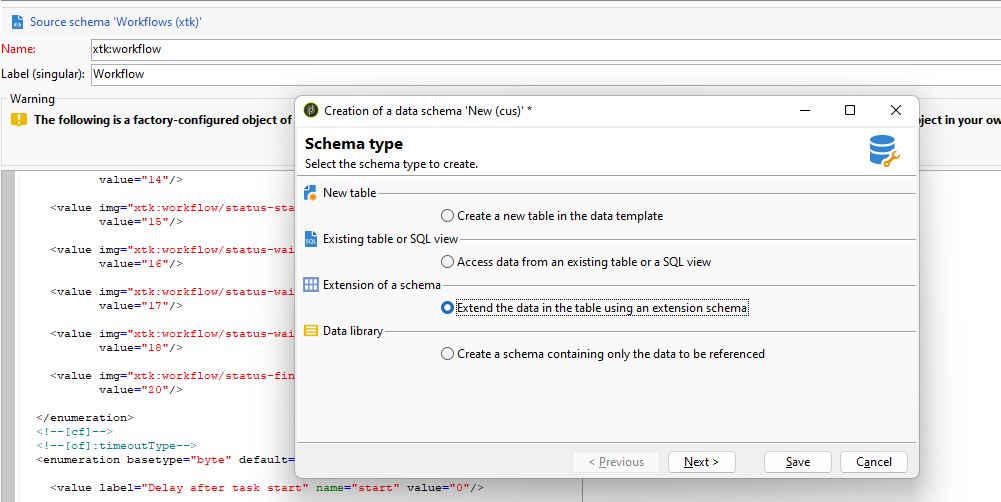
Extend the data using an extension schema.
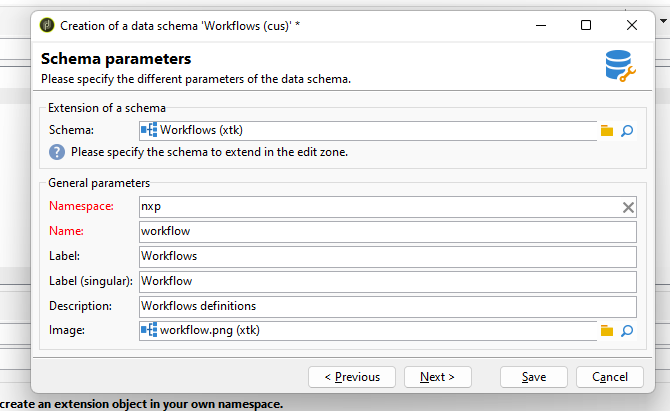
Make sure you are extending xtk:workflow and not nms:workflow
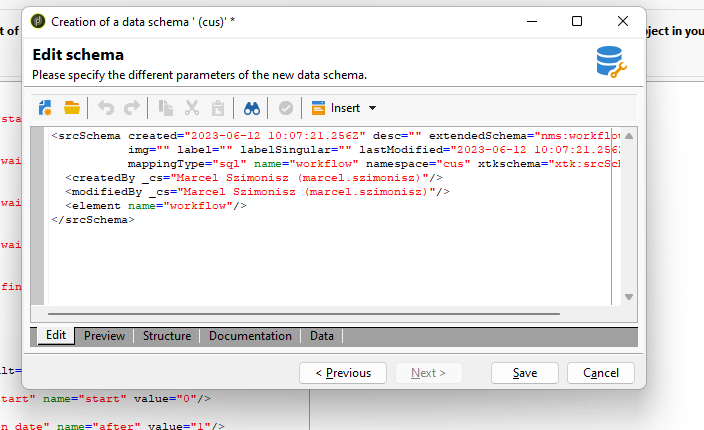
We will change the generated extension and add our fields, @lockedBy, additionally we will add new schema methods, that will be called to lock workflow.
NOTE: Even though we extended schema tocus:workflowwe will still have to refer to it asxtk:workflow
With the new field added to the workflow schema we will have to restart following technical workflows:
- Campaign jobs
- Cost calculation
- Jobs on service providers
- Jobs on deliveries in campaigns
- Offer notification
Or any other workflow that uses xtk:workflow table in any queries etc
<srcSchema created="2023-06-12 10:45:51.661Z" desc="Workflows definitions" extendedSchema="xtk:workflow"
img="xtk:workflow.png" label="Workflows" labelSingular="Workflow" lastModified="2023-06-12 10:45:51.662Z"
mappingType="sql" name="workflow" namespace="nxp" xtkschema="xtk:srcSchema">
<createdBy _cs="Marcel Szimonisz (marcel.szimonisz)"/>
<modifiedBy _cs="Marcel Szimonisz (marcel.szimonisz)"/>
<element desc="Workflows definitions" img="xtk:workflow.png" label="Workflows"
labelSingular="Workflow" name="workflow">
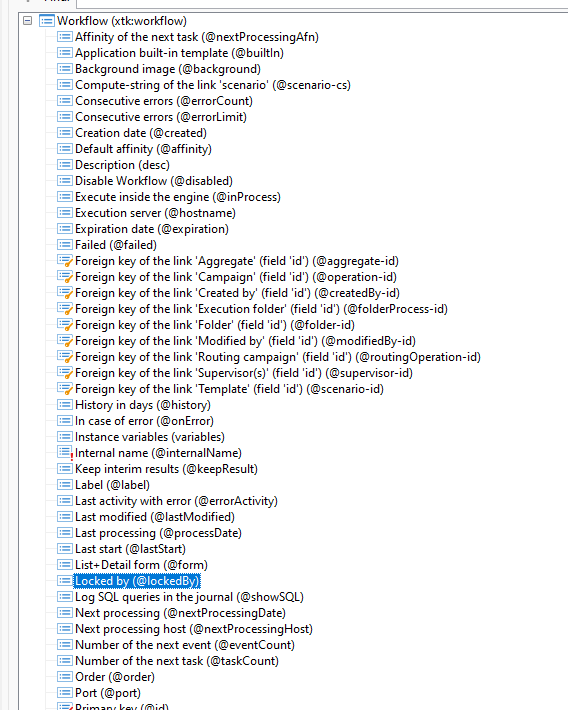
<attribute label="Locked by" name="lockedBy" type="long"/>
</element>
<methods>
<method library="cus:workflow.js" name="ToggleLockOnWorkflow" static="true">
<parameters>
<param desc="Workflow id" inout="in" name="id" type="int"/>
<!-- <param desc="Status" inout="out" name="status" type="boolean"/>-->
</parameters>
</method>
</methods>
</srcSchema>You can add entire element that can contain more information about the time it has been locked or full name of the operator who has to worklfow locked. Next we will have to update database structure by navigating to Tools-> Advanced -> Update database structure ...
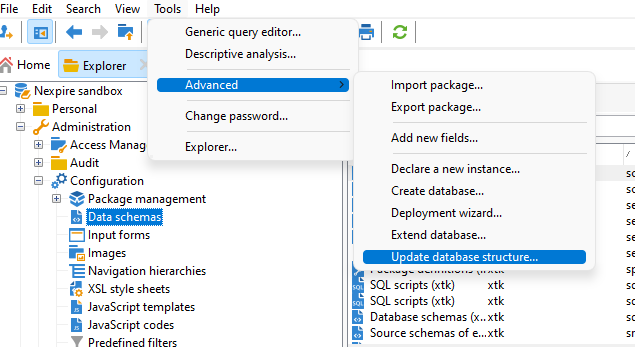
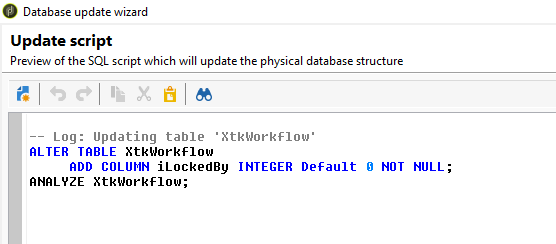
Do the best duo combination in Adobe Campaign Classic Clear the cache and logout for changes to take effect. Now we can see the field in the schema we can continue workfing on the form and on the javascript library.

Change the workflow form
Navigate to the Administration-> Configuration -> Input forms. We will add the lock button under the diagram container. Look for <-- [of]:Diagramme--> We can start by adding folliwing button form design right under it.
<!--Lock workflow -->
<container colcount="2" img="xtk:workflow.png" label="Diagram" name="diagram">
<container colspan="2" type="visibleGroup" visibleIf="@lockedBy=='0'">
<input img="nms:lock.png" label="Lock workflow" type="button">
<enter>
<!-- SOAP call to get the generated source -->
<soapCall name="ToggleLockOnWorkflow" service="xtk:workflow">
<param exprIn="@id" type="int"/>
</soapCall>
</enter>
</input>
</container>
<container colspan="2" type="visibleGroup" visibleIf="@lockedBy!='0'">
<input img="nms:unlock.png" label="Unlock workflow" type="button">
<enter>
<!-- SOAP call to get the generated source -->
<soapCall name="ToggleLockOnWorkflow" service="xtk:workflow">
<param exprIn="@id" type="int"/>
</soapCall>
</enter>
</input>
</container>
<container colspan="2" padding-top="5" type="hpaned">
<static/>
</container>
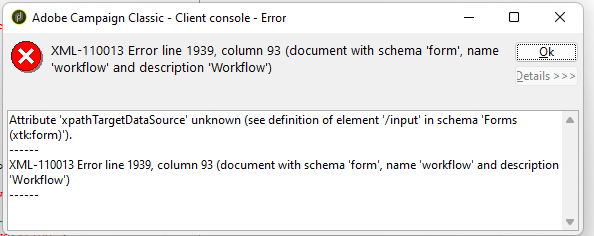
<!--Lock workflow -->When saving the form you may get many syntax errors from those one you can ignore as it was there since the fresh installation
XML-110013 Error line 1939, column 93 (document with schema 'form', name 'workflow' and description 'Workflow')
JavaScript Library
Similar to what we had described in the article how to add action button to the form view, we need to create JavaScript library nxp:workflow
var xtk_workflow_ToggleLockOnWorkflow = function(id){
  var operator = application.operator,
      wkf = NLWS.xtkWorkflow.load(id),
      isAdmin = application.operator.hasRight("admin"),
      lockedBy = wkf.lockedBy>0 ? 0 : operator.id;

  if (wkf.lockedBy > 0 && wkf.lockedBy != operator.id && !isAdmin){
    logError("Workflow is locked!")
    return
  }

  wkf.lockedBy = lockedBy;
  wkf.save();
  //return true;
}
Add form validation on leave
One way how to achieve lock can be by using validation form feature everytime the workflow is saved. I will only enable the validation when the @lockedBy is not 0. We will call another schema method that will check if user has all necessary rights to modify or unlock the workflow. Which is even better beacuse we can perform any type of check that is needed and we will have the power of JavaScript finally!
Add following xml at the very bottom of the xtk:workflow input form right before the </form>
<leave>
    <if expr="@lockedBy > 0">
        <soapCall name="CanBeModified" service="xtk:workflow">
        	<param exprIn="@id" name="id" type="int"/>
      	</soapCall>
      <!--
		did not work :)
		<check expr="@lockedBy != [currentOperator/@id]">
        <error>The workflow is locked!</error>
      </check>
	-->
    </if>
  </leave>
Add following code to the cus:workflow.js JavaScript library that we have created before
var xtk_workflow_CanBeModified = function(id){
 var operator = application.operator,
     wkf = NLWS.xtkWorkflow.load(id);
  if (wkf.lockedBy > 0 && wkf.lockedBy != operator.id)
    logError("Workflow is locked!")
  return;
}
As we have learnt before, we have to add schema method as well.
<method library="cus:workflow.js" name="CanBeModified" static="true">
      <parameters>
        <param desc="Workflow id" inout="in" name="id" type="int"/>
       <!-- <param desc="Status" inout="out" name="status" type="boolean"/>-->
      </parameters>
    </method>
With all in place now we can try if the lock feature is working as expected.
2023-06-13 08:24:07.559Z 0007C32E 0007C862 2 error log Workflow is locked!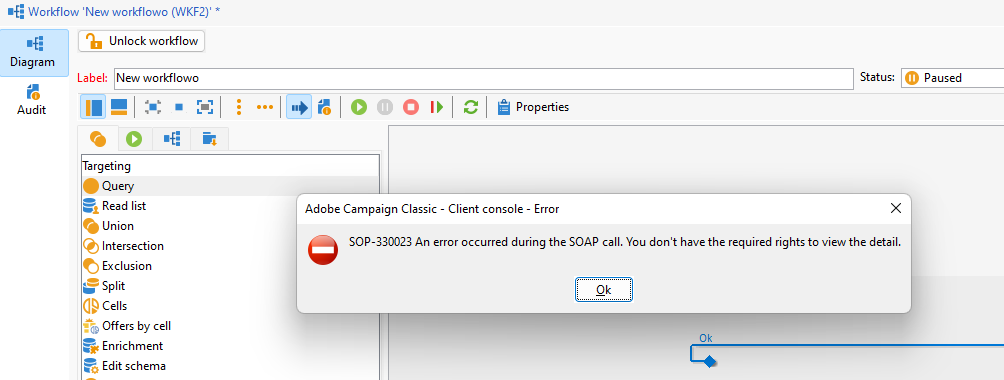
With the error hidden with settings on the security zone showErrors="false" we will get very generic eroro the real message can be seen in the web server log file or we can set showErrors to true so the message will look like following.
Add sysFilter to schema
We lock the workflow on the database level with sysFilter, so if you don’t use the workflow to make updates but instead use a script, the lock on the form will not prevent such changes. To lock the data schema, we add the following to achieve our goal.
<sysFilter name="writeAccess">
	<condition enabledIf="hasNamedRight('admin')=false" expr="@lockedBy = [currentOperator/@id] and @lockedBy > 0 or @lockedBy = 0"/>
</sysFilter>
With sysFilter we can also skip the <leave/> section in the form and thus xtk_workflow_CanBeModified can be removed from cus:workflow.js
Additionally we can add information such as email of operator who has the lock on the workflow, by adding link to operator and displaying the information next to the lock button.
Hidden feature: Workflow lock also applies for any workflow templates that can be used as campaign workflows or inside sub-worfklow activity, this is to prevent anybody who can access the templates (shared templates) to be modified by accident.
Hope this tutorial will get you started and create more advanced workflow lock. Let me know how it went.
Share With Others


ParthaSarathy
says:Useful feature!